
Set up defect detection
You do not need training data or a data scientist. You describe what you are looking for in plain words, and the cameras start finding it.
Before you start
Section titled “Before you start”- At least one registered device in a device group
- A clear idea of the defect you want caught — “solder bridge”, “missing clip”
1. Choose the group
Section titled “1. Choose the group”Open Captures and pick your device group from the selector in the top right, then open the Config tab.
Everything you set here applies to every camera in that group.
2. Describe what to look for
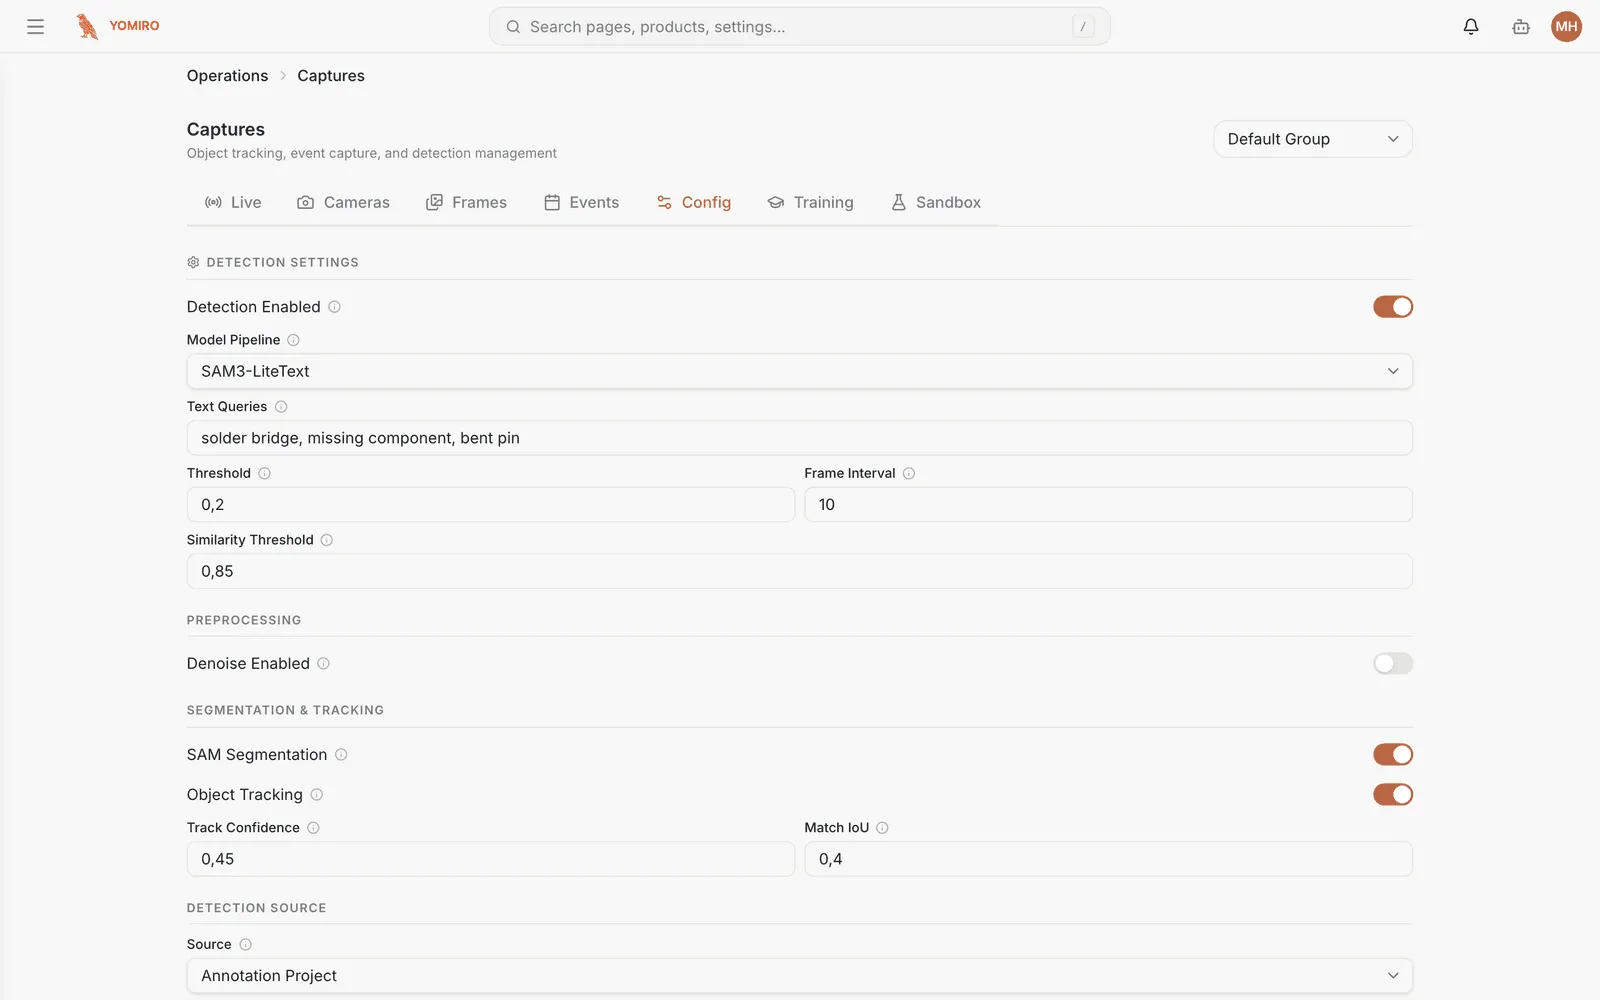
Section titled “2. Describe what to look for”Turn Detection Enabled on and type what you are looking for into Text Queries, separated by commas:
solder bridge, missing component, bent pinThis is the part people expect to be harder than it is. The model reads your description and finds matching objects — there is no dataset to collect and no model to train.
Use the words your team already uses on the floor. If an operator would say “bent pin”, write that.
3. Set how strict it is
Section titled “3. Set how strict it is”| Setting | What it does | Start with |
|---|---|---|
| Threshold | How confident the model must be before it counts something. Higher means fewer, surer detections | 0.2, then tune |
| Frame Interval | Run detection every N frames. Higher means less load on the device | 10 |
| Similarity Threshold | How alike two detections must be to count as the same thing | Leave as is |
Getting the threshold right is trial and error, and that is expected. Too low and every shadow is a defect; too high and real ones slip through. Do not agonise over it here — step 5 is how you settle it properly.
4. Turn on tracking if you are counting
Section titled “4. Turn on tracking if you are counting”| Setting | Turn on when |
|---|---|
| Object Tracking | You are counting things. Without it, one defect sitting in view for ten frames counts ten times |
| SAM Segmentation | You need the exact shape of a defect, not just a box around it |
| Denoise | The feed is grainy — poor light, cheap optics, vibration |
Tracking is the one most people need and forget. If your counts look absurdly high, this is why.
Changes apply immediately. There is no restart, and no need to schedule a window — the devices pick up the new settings and carry on.
5. Prove it before you trust it
Section titled “5. Prove it before you trust it”Open the Sandbox tab, upload a recorded video from the line, and run it with the settings you just chose.
You get a processing history you can compare across runs, which is how you answer the real question: would this setting have caught last month’s escape?
Do this before you rely on a threshold in production. It costs ten minutes and it is the difference between a number you picked and a number you can defend.
Next steps
Section titled “Next steps”- Get alerted when detections spike, instead of watching the feed
- Build a dashboard to see the trend
- Inspection if you are comparing against a known-good reference rather than describing defects